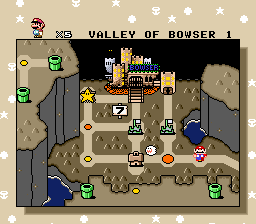
Valley of Bowser 1
| Valley of Bowser 1 | ||||||||||||||

| ||||||||||||||
| ← Sunken Ghost Ship ~ Valley of Bowser 2 → | ||||||||||||||
| Powerups | ||||||||||||||
| Lunar Dragon | ||||||||||||||
| Goal Times | ||||||||||||||
| ||||||||||||||
Contents
96 Exit & All Castles
In 96 Exit the red blocks will be active, so the first mole will be trapped.
Normal
|
Video: Valley of Bowser 1 - Cape, Yoshi Source: Sten |
Fastest
The movement from 390-388 is difficult to do well but saves doing a second left-right. The ending Yoshifly ground pound is quite precise and saves less than half a second compared to the spin jump method.
|
Video: Valley of Bowser 1 - Cape, Yoshi Source: ThirdLavaDolphin |
No Starworld
Easy
Take a throw block across the goal for a backup cape.
|
Video: Valley of Bowser 1 - Cape, Get Backup Cape (Easy) Source: Sten |
Normal
Spinflying through the mega mole at 0:19 needs to be timed when Mario is passing under the middle of the slope on the ceiling.
At the end, make sure to keep holding right against the throw block wall. Pipe fly is optional and saves 10 frames.
|
Video: Valley of Bowser 1 - Cape, Get Backup Cape (Pipe fly) Source: Lui |
Fast
The take off at 0:18 sets up the flight meter for the next mega mole section, in order to avoid losing speed running off 2 ledges, saving 8 frames. For the second ledge, it's necessary to go neutral on the D-Pad (can hold down) and let go of Y/X right before the edge, otherwise Mario will enter flight state and bonk on the wall.
The optimal throw block wall strat at the end is quite risky and tricky to execute and will not grant a backup cape, so the normal strat may be used instead.
|
Video: Valley of Bowser 1 - Cape (Fast) Source: Lui |
95 Exit, No Cape
Jumping on the first step of the second set of stairs ensures a bigger window to tongue the Mega Mole, as opposed to jumping on the second step.
|
Video: Valley of Bowser 1 - No Cape, Yoshi (Red Blocks Active) Source: Lui |
No Cape, No Starworld
|
Video: Valley of Bowser 1 - No Cape Source: Sten |
Lunar Dragon
|
Video: Valley of Bowser 1 - Lunar Dragon Source: Umari0 |