Small Only switch palace route
Contents
- 1 Introduction
- 2 Route
- 3 Levels
- 3.1 Yoshi's Island 2-4
- 3.2 Iggy's Castle
- 3.3 Donut Plains 1 Normal exit
- 3.4 Donut Plains 2 Secret exit
- 3.5 Green Switch Palace
- 3.6 Donut Plains 2 Normal exit
- 3.7 Donut Ghost House Normal exit
- 3.8 Donut Plains 3
- 3.9 Donut Plains 4
- 3.10 Morton's Castle
- 3.11 Vanilla Dome 1 Normal exit
- 3.12 Vanilla Dome 2 Secret exit
- 3.13 Red Switch Palace
- 3.14 Vanilla Dome 1 Normal exit
- 3.15 Vanilla Secret 1 Secret exit
- 3.16 Star World 2 Secret exit
- 3.17 Star World 3 Secret exit
- 3.18 Star World 4 Secret exit
- 3.19 Front Door
- 3.20 Bowser fight
Introduction
The objective of this tutorial is to make Small Only, also known as Low%, more friendly to beginners and to lower the intro skill level for the category, allowing the player to have a starting point from which they can move to more advanced strats as they feel more comfortable. In this tutorial it will be assumed that the reader has little to no knowledge regarding the strats that are used in each level, so we will go into detail about some of the strats and options that are available. In this route the objective is to activate the green and red switch palaces before going to Star World, that way some of the hardest tricks in the more advanced routes are not required. The format we will use is going level by level, describing useful or important information and going through some of the more friendly options available, some strats are required to advance while some are just optimizations over casual gameplay that are not required to finish the run. Some of the Individual Level (IL) pages will be linked to show different videos and options for that level, but it's still highly recommended to check out each of the ILs pages.
The rules for the category are:
- Time begins the frame Mario appears in the opening cutscene. This is 2.2 seconds after selecting 1 player game.
- Time ends on the frame that Peach appears outside of Bowser's Clown Car.
- No Arbitrary Code Execution.
- No Powerups allowed (Mushroom, Midway Points, Fire Flower, Cape).
- No Yoshi.
- Penalties:
- If any power-up is obtained, or Yoshi is ridden, die as soon as possible without utilizing it.
- If a mushroom is gained by taking an item through the goal tape, die as soon as possible.
- If you grab a checkpoint, take damage as soon as possible, finish the level, and then redo that same exit.
Route
- Yoshi's Island 2
- Yoshi's Island 3
- Yoshi's Island 4
- Iggy's Castle
- Donut Plains 1 normal exit
- Donut Plains 2 secret exit
- Green Switch Palace
- Donut Plains 2 normal exit
- Donut Ghost House
- Donut Plains 3
- Donut Plains 4
- Morton's Castle
- Vanilla Dome 1 normal exit
- Vanilla Dome 2 secret exit
- Red Switch Palace
- Vanilla Dome 1 secret exit
- Vanilla Secret 1 secret exit
- Star World 2 secret exit
- Star World 3 secret exit
- Star World 4 secret exit
- Front Door
Levels
Yoshi's Island 2-4
The first 3 levels, Yoshi's Island 2, 3 and 4, are pretty straight forward, with just a couple of optimizations that can save little time, it's still recommended to check each of the IL pages to understand what can be done in them.
Iggy's Castle
For the first cage grab over the lava a regrab should be done to gain as much distance as possible, that is tapping jump (spin jump in this case) and pressing it again while in midair, that way Mario should reach enough distance to be very close to the Podoboo, when near the lower edge of the cage up or down should be pressed to grab the cage again, once the Podoboo starts to go down you can go over it safely.
In the Iggy fight itself you can safely spin jump in front of Iggy to get the first hit, after it aim carefuly to get more hits and push him off the platform. Lower bounces make the fight go faster, but be careful of going to fast since that will make the hit not register.
|
Video: Iggy's Castle Small Only no underball Source: Zapplex |
Donut Plains 1 Normal exit
Another pretty straight forward level in this case, we want to get the normal exit since this route goes to Green Switch Palace.
|
Video: Donut Plains 1 Normal Exit - Small Mario Only Source: Sten |
Donut Plains 2 Secret exit
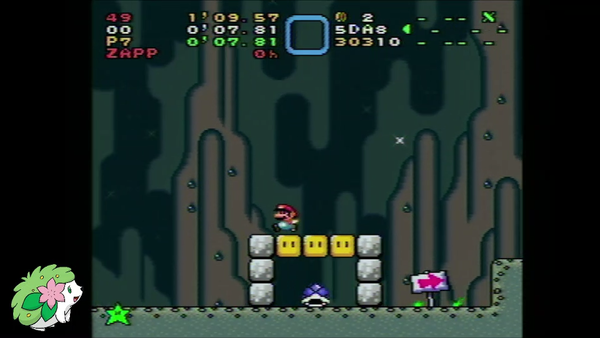
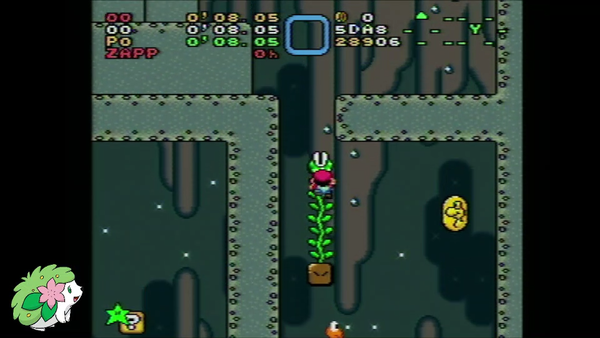
In the fist visit to Donut Plains 2 we want to get the secret exit first to get to the green switch. A vine needs to be released from a block to get to the key on the second room, for this we can bring a Buzzy Bettle from the autoscroller to hit the block. If the beetle is lost or despawned there's a backup, but it's speed dependant and might take a while.
|
Video: Donut Plains Secret exit Small Only Source: Zapplex |
|
Video: Donut Plains Secret exit Small Only backup Source: Zapplex |
Green Switch Palace
Green Switch Palace is another straight forward level, up throw the shell at the start, run and jump on the switch.
|
Video: Green Switch Palace Small Only Source: Zapplex |
Donut Plains 2 Normal exit
The optimal strat for this level is to do a beetle jump to get to the pipe faster, this is not required, but saves a decent amount of time taking into account that it's quite simple to setup, it's also a good practice to get familiar with it in preparation to more advanced strats.
Steps to setup the beetle jump:
- Up throw the beetle, make sure it goes only up and not to the sides for this setup.
- Jump to catch it while it's falling, ideally when it has the faster downward velocity possible.
- When it starts shaking do a full jump and keep jump held the whole time, the beetle should wake up when Mario just starts to go down and Mario will jump, remember to press diagonal right up so you enter the pipe.
|
Video: Donut Plains 2 Normal Exit - Small Only Source: Rezephae |
Donut Ghost House Normal exit
Intended route: The intended route for this level is to take the door in the second room, you'll end up in a copy of the same room, enter "the same door" again, that will lead again to room 2 (it's a bit confusing), but under the stairs, hit the block, release the vine, climb and enter the door above. The reason to mention this is because much people have only seen speedruns and are not very familiar with casual gameplay and taking the intended route it's around 7 to 8 seconds slower.
Speedstrat: The speed strat skips the intended route and goes directly from room 2 to the exit. The direction the boos go when you are spin jumping it's determined the moment they spawn, for them to go the direction needed you should spin jump at the bottom of the stairs entering room 2, perform a second spin jump to be on the stairs a little as possible to regain p speed, run under the boo and spin jump on top of it, going left on every bounce so you can lure the boo and land on the upper floor. If the first spin jump on the boo is not done with p speed the camera won't scroll up and you won't be able to see the door on top, backups for this are either getting p speed and jumping once or trying to guess where the door is, both methods are done with Mario offscreen and there's a risk to fall.
|
Video: Donut Ghost House Small back boo spin Source: Zapplex |
|
Video: Donut Ghost House Small no p speed backup Source: Zapplex |
Donut Plains 3
To get p speed of the rotating platform tap spin jump to get on the left side of it, run without holding jump to the end of the second platform and jump at the edge of it, it's a bit trickier than it looks, if there's issues getting p speed doing a left right at the beginning is also an option, scrolling near the beginning makes the level line up consistently.
Just like in YI3 you can take advantage of the platforms that move to the right to get a boost and save some time. Going to the clouds strat is speed dependant and you might not get there every time, going under can be used as an alternative.
This is a very tricky level and it's easily one of the hardest ones on the run, doing it casual it's heavily advised if you are having troubles with the speedstrats here.
|
Video: Donut Plains 3 - Small Only (Clouds) Source: Rezephae |
|
Video: Donut Plains 3 - Small Only (No Clouds) Source: Rezephae |
Donut Plains 4
The safest strat for this level is to grab the star from the roulette block, waiting for the star under the berry and timing the grab gives enough space to regain p speed for the rest of the level.
|
Video: Donut Plains 4 small only star grab Source: Zapplex |
Morton's Castle
Morton's castle consist on 3 rooms + the Morton fight.
For the first room you can enter the level pressing right and pressing run at a visual cue on the background, that ensures that you'll get p speed and avoid the Thwimps on the way. Jumping on the stairs can save some frames, but beware to not do full spin jumps or you might clip under the stairs.
The second room goes to the left, to jump above the Thwomps do a full jump against the wall under them while pressing left before touching the wall, that way Mario should have enough speed to get the height to clear them.
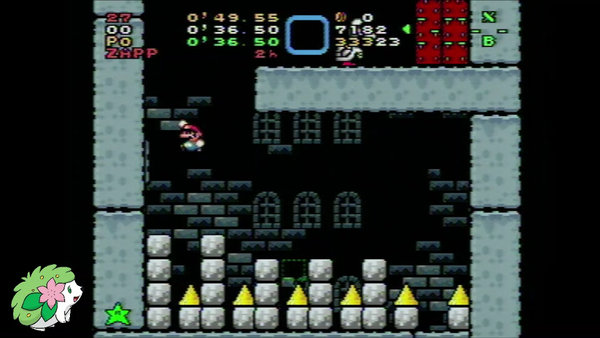
The third and final room before the boss fight it's a vertical room, the amount of sprites in the room will produce variable amounts of lag, making some of the jumps hard to time.
One of the better options is to grab the spring in the middle of the room and use it at the end of the section to get to the boss door allowing you to skip half a cycle. If that's the strat chosen beware that there's a chance that you either miss the spring and fall into the spikes or that the spring clips Mario into the cement blocks.
There's a way to manipulate the 2 Dry Bones before the door to get them out of the way by doing a wide jump before reaching them, it might make the climb a bit more comfortable.
If the spring is lost or if it's chosen to not go for the spring strat the ledge that allows you to jump to where the boss door is will come out when the first yellow spike touches the wall, allowing you to get there as soon as possible.
The Morton fight it's very straight forward, jump on him as soon as possible then stand on his left side, a couple of frames after you see him "unsquish" do a full jump, if timed correctly Mario should land on Morton again as soon as possible.
|
Video: Morton's Castle small only Source: Zapplex |
|
Video: Morton's Castle no spring backup Source: Zapplex |
Vanilla Dome 1 Normal exit
Entering Vanilla Dome the first objective is to activate the red switch, for this we do Vanilla Dome 1 normal exit first.
Doing a left right at the start of the level increases the chance to get p speed at the first jump.
The second room might be a bit dangerous to do without a star since any mistake might cause the layer 2 to go fully down before you can reach the other side, taking the star is a safer but slower option.
|
Video: Vanilla Dome 1 small normal exit Source: Zapplex |
Vanilla Dome 2 Secret exit
Before getting into strats let's talk a bit about the p meter in the game, when running with Mario the p meter increases until it reaches a value of 7, at that point Mario will get p speed, if Mario isn't running (walking without running as an example) the p meter will go down or not increase if 0. There are some exceptions to this, when Mario get in water or is holding to a vine the p meter will freeze, not going down even if you release run or touch ground while under water, there's a small section in this level that takes advantage of that property to regain p speed faster.
At the beginning of the level there's a beetle that you want to bring with you just for the fisrt water section, when stomping to stun it you want to go a little bit to the left of the flat surface it's on, that way when going into the water you should have enough p meter to regain p speed when you get off the vine, for it you also must grab the vine when coming out of the water and jump on ground from the vine as soon as possible to avoid draining p meter while Mario is on the air.
Keep in mind that not getting p speed will make the second beetle we use in the next water section wake up a bit before getting to the part you leave the water again, use the shaking of the beetle before it wakes up as a cue to when to let go.
|
Video: Vanilla Dome 2 Secret Exit - Small Only Source: Rezephae |
Red Switch Palace
Just go to the right and press the switch, the slow and fast strat have around a 0.4 second difference, use the one that it's more comfortable.
|
Video: Red Switch Palace - Small Source: Sten |
|
Video: Red Switch Palace - Small fast room 1 Source: Schwartz_RTA |
Vanilla Dome 1 Normal exit
Now that both green and red blocks are active we can go to Star World, for that we need the secret exit in Vanilla Dome 1, there's not much to say in this case, the same concept as the normal exit room 1 applies, except that we take the red block staircase to where the key is.
|
Video: Vanilla Dome 1 small secret exit Source: Zapplex |
Vanilla Secret 1 Secret exit
To get the secret exit in this level and to progress further we need to get to a pipe that's it's out of reach, for this the spring that it's next to it can be used, there are several ways to use it, but we will focus on 2 of them.
To get to the spring jump itself a bit faster a shell can be taken from the first Koopa in the level to do a wall shell jump and avoid using the first vine.
Steps for a wall shell jump:
- Perform a full jump next to a wall while holding a shell, don't let go of jump at any time.
- Just before the peak of the jump kick the shell agaisnt a wall.
- If the shell goes under Mario you were to quick to kick the shell, if the shell hits Mario then you were late, adjust acordingly while learning. If it seems like the shell went though Mario then you were too close to the wall, there's a sprite interaction frame rule that makes it so Mario starts interacting with thrown objects after a set amount of frames have passed, if you are too close to the wall the shell doesn't have enough time to start interacting with Mario.
We get and use the spring to get to the pipe, for this we have 2 options that are fairly easy:
- Get the spring and go to the pea bouncer to the left, once on it time jumping from it and up throwing the spring so Mario goes over the sping in midair and bounces to the pipe.
- Use one of the unintended properties of springs, fall to the longest flat section under the pipe, get p speed and jump near the end of the platform, once above the gap next to it release both run and jump and repress them once you see Mario starts bouncing off the spring.
Finally the last obstacle after the pipe it's a Puntin' Chuck that awaits before the goal. The moment it kicks footballs it's dictated by a global timer that runs at all times, making predicting when it kicks one impossible, the only way to avoid getting hit by a unlucky football it's to watch when the football appears on the feet of the Chuck and react to it.
|
Video: Vanilla Secret 1 small spring jumps Source: Zapplex |
|
Video: Vanilla Secret 1 small secret exit Source: Zapplex |
Star World 2 Secret exit
When entering the level avoid touching the ground until Blue Baby Yoshi hatches, when you grab it touch the ground for a moment so Yoshi eats the first 2 fishes on the way up. It's safe to stay above the screen, a cue to start pressing down is when the second row of diagonal fishes appear. A fast way to get to where the key and key hole are is to up throw yoshi to avoid the corner of the ground.
|
Video: Star World 2 small secret exit Source: Zapplex |
Star World 3 Secret exit
To get the secret exit in Star World 3 the cloud from Lakitu is required, to get it we must hit Lakitu with a block. Sometimes the block will not interact with Lakitu failing to hit it, to secure the hit and the cloud we can grab a block, stand on top of the block pilar on the left and wait for Lakitu to go over Mario to up throw the block, idealy you want to keep the block and use it to hit the block with the key, but it's not required.
If you miss the hit beware that if there are too many sprites spawned you won't be able to pick up blocks.
|
Video: Star World 3 small secret exit Source: Zapplex |
Star World 4 Secret exit
With the green and red blocks active the way to the secret exit is fairly simple.
A small optimization here is once again to take advantage of the platforms going right to get a small boost.
Remember to grab a shell to take the key out of the block.
|
Video: Star World 4 small secret exit Source: Zapplex |
Front Door
The fastest of the first set of rooms it's door 2, in here there's the option to hit the fence door and time a jump so Mario skips the turning animation to go behind the fence and jump on the Koopas behind, if timed poorly the Koopas might hit Mario or missing the animation skip, while going in front it's around 1 second slower.
The fastest of the second set of rooms it's door 7, but it's very tricky since the bowser statues in it shoot fire based on the global timer, room 5 is highly recommended instead.
Dark room is one of the places in the game that will have variable amounts of lag making some jumps hard to time, near the end of dark room care should be taken if p speed is lost right before the last 2 Ninjis, if you choose to stomp on one of the Ninjis right before it starts to go up sometimes the game will consider Mario to be inside the Ninji's hitbox instead of stomping it and it will kill Mario.
|
Video: Front Door room 2 front fence Source: Zapplex |
|
Video: Front Door Small Only room 5 Source: Rezephae |
Bowser fight
In this fight we want to bring a Mechakoopa from each phase to the next, in the first phase it's ideal to hit bowser as soon as posible for the first hit and just after the second batch of Mechakoopas is thrown, giving Bowser the first hit consistently at the same moment in every run ensures that he will stop at the same point every time for the second hit.
In the second phase we use the Mechakoopa brought from the first phase to perform ball skip, which skips one Bowser's animations making the fight faster.
The setup for ball skip goes something like this:
- When Bowser appears from the clown cart at the start of the second phase kick the Mechakoopa to the right.
- Before Bowser starts moving run to the left side of the screen and stay there.
- When Bowser stops moving and begins to throw a ball restun the Mechakoopa and bring it to the right side of the screen.
- When the ball is around the middle of the screen jump and up throw the Mechakoopa.
If done correctly Bowser will be hit during the animation of the second ball, skipping it and going to the next Mechakoopa batch, again we want to bring a Mechakoopa for the next and final phase.
We use the Mechakoopa from the previous phase to hit Bowser as soon as he has his hitbox active, that is when he fully appears from the clown cart at the beginning of the last phase, a good cue is to wait until Bowser opens his eyes, at that moment jump and upthrow the Mechakoopa.
|
Video: Bowser Fight - Small Only Source: Rezephae |
