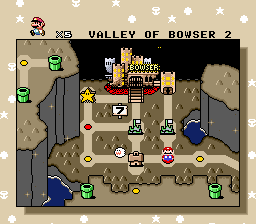
まおうクッパのたに コース2
| まおうクッパのたに コース2 | |||||||||||||||||||||||

| |||||||||||||||||||||||
| ← まおうクッパのたに コース1 ~ まおうクッパのたに コース3 → | |||||||||||||||||||||||
| Powerups | |||||||||||||||||||||||
| Lunar Dragon | |||||||||||||||||||||||
| Goal Times | |||||||||||||||||||||||
| |||||||||||||||||||||||
Contents
Normal Exit
96 Exit & All Castles
The koopa after the first flight walks slower in All Casles, leaving a smaller window to land behind it.
|
Video: Valley of Bowser 2 Normal Exit - Cape, Yoshi Source: Sten |
95 Exit, No Cape
The delay at the beginning gets the sandbar into a good position.
|
Video: Valley of Bowser 2 Normal Exit - No Cape, Yoshi Source: Sten |
Lunar Dragon
|
Video: Valley of Bowser 2 Normal Exit - Lunar Dragon Source: Umari0 |
Secret Exit
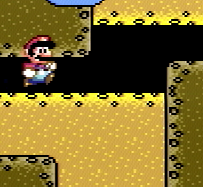
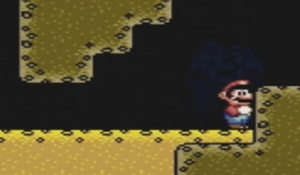
Sandbar clip saves 12.87 seconds over the normal strat, however it is a *2 frame trick, and spin jumping early kills mario, while spin jumping late will just not get the clip.
|
👀 Visual Cue: |
To be more specific, there are 2 guaranteed frames to clip through the sandbar. Because of the fickle nature of Mario's y-subpixel, there is a chance that one or both of the 2 frames before these 2 guaranteed frames won't kill Mario, but get the sandbar clip as well.
There's effectively a 1/8 chance only the 1st of the two early frames before the guaranteed frames clips through, a 1/8 chance only the 2nd frame before the guaranteed frames clips through, and a 1/16 chance that both can clip Mario through; in total, this gives a 3/16 (18.75%) chance that hitting the spin jump one or two frames early will still clip Mario through.
This phenomenon also leads to a paradox where one sandbar attempt can be successful, while another attempt that spin jumps later can have Mario die.
Cape Categories
No Sandbar Clip
Grabbing the backup cape loses no time if you already decided to not do sandbar.
|
Video: Valley of Bowser 2 Secret Exit - Cape, Grab Backup Cape (No Sandbar) Source: SilverStar6609 |
|
Video: Valley of Bowser 2 Secret Exit - Cape (No Sandbar) Source: Sten |
Sandbar Clip
|
Video: Valley of Bowser 2 Secret Exit - Cape (Sandbar Clip) Source: Sten |
|
Video: Sandbar Clip Tutorial Source: Bramz |
Double Sandbar Clip
The clip in room 3 saves about a second.
|
Video: Valley of Bowser 2 Secret Exit - Cape (Double Sandbar Clip) Source: SilverStar6609 |
No Cape Categories
The jump up to the secret exit is luck based. If you miss it, just wait for the sandbar to rise and use it to jump up.
No Sandbar Clip
|
Video: Valley of Bowser 2 Secret Exit - No Cape (No Sandbar) Source: Sten |
Sandbar Clip
|
Video: Valley of Bowser 2 Secret Exit - No Cape (Sandbar Clip) Source: Sten |
Double Sandbar Clip
The clip in room 3 lets you avoid the luck jump.
|
Video: Valley of Bowser 2 Secret Exit - No Cape (Double Sandbar Clip) Source: SilverStar6609 |
|
👀 Visual Cue: |
|
👀 Visual Cue: |
Nibnaclip
Room 1 can be adapted if you don't have yoshi by having a small delay at the beginning to let the sandbar go down.
|
Video: Valley of Bowser 2 Secret Exit - No Cape (Nibnaclip) Source: Schwartz_RTA |
Clip 1 skip can be achieved by duping the key fast enough. If don't get the key fast, just do clip 1.
|
Video: Valley of Bowser 2 Secret Exit - No Cape (Nibnaclip, clip 1 skip) Source: Schwartz_RTA |
The video below shows a backup shell grab in room 1 and avoid doing clip 3 (which can be difficult).
|
Video: Valley of Bowser 2 Secret Exit - No Cape (Nibnaclip, ultra safe) Source: Schwartz_RTA |

