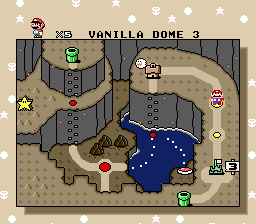
バニラドーム コース3
| バニラドーム コース3 | ||||||||||

| ||||||||||
| ← バニラドーム コース2 ~ バニラドーム コース4 → | ||||||||||
| Powerups | ||||||||||
| Lunar Dragon | ||||||||||
| Goal Times | ||||||||||
| ||||||||||
Contents
マントカテゴリ
前半
青い土管を擦るようにすると、マリオが急な斜面を下る際に地面に沿って浮かずに進むようになります。 これにより、2つ目のいかだの終わりまでに安定してPを貯めることができます。
|
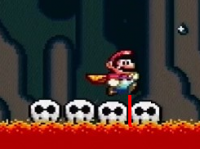
👀 Visual Cue: |
通常飛行チャート
|
Video: Vanilla Dome 3 First Half - Cape (Safe) Source: Sten |
高速チャート
上記の通常チャートに対するいくらかの最適化が以下のYouTube動画で説明されている。
|
Video: VD3 Room 1 (Cape) - Easy 272 Source: ThirdLavaDolphin |
Yolo Fly
This strat is very tricky, and only saves about 1.2 seconds.
|
Video: Vanilla Dome 3 First Half - Cape (Yolo Fly) Source: Lui |
後半
In All Castles, red blocks will not be active, so it is possible to spinfly and hit the yoshi block from the side.
Safe Strat
Try to avoid touching the walls when flying around on yoshi as it is possible to wall clip and lose p-speed.
|
Video: Vanilla Dome 3 Second Half - Cape, Get Yoshi (Safe Strat) Source: Sten |
Blargg Skip
Saves about 2 seconds over the normal flight. It can be a little tricky to get enough height to get over the lava wall, but it should be fairly consistent if you fly from just before the blargg. If you take off too late you'll stay inside the alcove area and can still attempt the normal flight as a backup.
|
Video: Vanilla Dome 3 Second Half - Cape, Get Yoshi (Blargg Skip) Source: Sten |
Raft Skip
The inputs for this strat are quite complex, but can be made very consistent with practice. It is important to note that when bouncing off the blargg, you must be holding b, and not holding any direction on the d-pad. Right should be held as soon as possible after the bounce.
|
Video: Vanilla Dome 3 Second Half - Cape, Get Yoshi (Raft Skip) Source: Sten |
All Castles
Buzzy Bounce
Bouncing on the buzzy to avoid walking up the wall saves time without red blocks. Keep in mind this will slightly shift the take-off spot for raft skip because of not having any pspeed when grabbing yoshi.
|
Video: Vanilla Dome 3 Buzzy Bounce (No Red Blocks, Get Yoshi) Source: SilverStar6609 |
95 Exit, No Cape
No Shell Jump
|
Video: Vanilla Dome 3 - No Cape, Get Yoshi (No Shell Jump) Source: Calco2 |
Wall Shell Jump
|
Video: Vanilla Dome 3 - No Cape, Get Yoshi (Wall Shell Jump) Source: Calco2 |
Shell Jump
This strat shows off a different way of shell jumping up to the bonus game pipe. It also shows a faster yoshi grab in the second half of the stage.
|
Video: Vanilla Dome 3 - No Cape, Get Yoshi (Shell Jump) Source: Calco2 |
Buzzy Bounce
|
Video: Vanilla Dome 3 - No Cape, Special World ON, (Buzzy Bounce) Source: Schwartz_RTA |
If you get a corner clip trying to do the buzzy bounce strat, there is a backup :
|
Video: Vanilla Dome 3 - No Cape, Special World ON, (Buzzy Bounce backup) Source: Schwartz_RTA |
All Castles, No Cape
No Blue Yoshi
Shows the fast yoshi spawn you can do in this category. Could do the same with fast room 1 by grabbing a shell before the pipe. Also shows the no blue shell end with setup for getting p-speed for the final raft jump.
|
Video: Vanilla Dome 3 - No Cape, Get Yoshi (No Shell Jump) Source: Fitz1889 |
Blue Yoshi Route
|
Video: Vanilla Dome 3 - No Cape, Blue Yoshi Source: Schwartz_RTA |
If you have problems with the blargg section at the start, you can dismount yoshi to make it less tight.
|
Video: Vanilla Dome 3 - No Cape, Blue Yoshi (Safe Dismount) Source: Schwartz_RTA |
If you miss the shell at the midway, here's a backup :
|
Video: Vanilla Dome 3 - No Cape, Blue Yoshi (Shell Backup) Source: Schwartz_RTA |
It is really tight to make it to the top of the level at the end. Make sure to be as fast as you can while doing this backup.
Lunar Dragon
|
Video: Vanilla Dome 3 Normal Exit - Lunar Dragon, Get Yoshi Source: Umari0 |
Small Only
|
Video: Vanilla Dome 3 - Small Only Source: rezephos |
