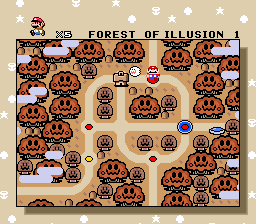
まよいのもり コース1
| まよいのもり コース1 | ||||||||||||||||||||||||||||||||

| ||||||||||||||||||||||||||||||||
| ← せんべいやまのしろ ~ まよいのもり コース2 → | ||||||||||||||||||||||||||||||||
| Powerups | ||||||||||||||||||||||||||||||||
| Lunar Dragon | — | |||||||||||||||||||||||||||||||
| Goal Times | ||||||||||||||||||||||||||||||||
| ||||||||||||||||||||||||||||||||
Contents
Normal Exit
For all the wings strats, it is important to pick up the shell with right momentum before each attempt at the dupe. It is also important rub up against the block, but not hold right when throwing the shell.
96 Exit
No Wings
|
Video: Forest of Illusion 1 Normal Exit - 96 Exit (No Wings) Source: Sten |
Wings
|
Video: Forest of Illusion 1 Normal Exit - 96 Exit (Wings) Source: Sten |
|
Video: Forest of Illusion 1 Wings Tutorial Source: Bramz |
All Castles
No Wings
|
Video: Forest of Illusion 1 Normal Exit - All Castles (No Wings) Source: Sten |
Wings
Spit out the red shell as the left side of the midway goes offscreen in order to line up correctly for the green shell.
|
Video: Forest of Illusion 1 Normal Exit - All Castles (Wings) Source: Sten |
This strat causes less lag, but is more difficult.
|
Video: Forest of Illusion 1 Normal Exit - All Castles (Wings, Lag Reduction) Source: Bramz |
Key Wings
These wings are between 1 and 2 seconds faster than the normal version.
The most difficult part of this version is picking the shell up with leftward momentum. Being too far left will have the shell not bounce on the ground and too far right will drop yoshi in the pit, and lastly, depending on yoshi's bouncing, it can be tight to not land back on yoshi after dismounting him. The wings are invisible because the sprite slots are full in this area, while the sparkles still show up since they aren't sprites.
One last thing to note is there can be a variable amount of lag depending on the score, so score manipulation is recommended, although not required.
|
Video: Forest of Illusion 1 Normal Exit - All Castles (Key Wings) Source: SilverStar6609 |
No Starworld
No Wings
Eat the shell at the midway to reduce lag in the rest of the stage.
|
Video: Forest of Illusion 1 Normal Exit - No Starworld (No Wings) Source: Sten |
Wings
Grabbing the green shell for these wings can be hard to time.
|
Video: Forest of Illusion 1 Normal Exit - No Starworld (Wings) Source: Sten |
Key Wings
Same as in the All Castles version, but with a different setup for the shell spit.
|
Video: Forest of Illusion 1 Normal Exit - No Starworld (Key Wings) Source: SilverStar6609 |
95 Exit, No Cape
No wings
|
Video: Forest of Illusion 1 Normal Exit - No Cape Source: Schwartz_RTA |
Wings
This strategy saves 8s. NCNSW wings can be done too. They are easier to do, but slower.
|
Video: Forest of Illusion 1 Normal Exit - No Cape, Wings Source: Schwartz_RTA |
No Cape, No Starworld
Normal Strat
Grabbing the flower is only worthwhile if you are already fire mario, or have no powerup.
|
Video: Forest of Illusion 1 Normal Exit - No Cape, Yoshi, Get Fire Source: Sten |
Backup Strats
Skipping the fire flower powerup transition saves a little time. Spitting the shell into the hammer bro at the end stops him from throwing more hammers and sets the shell up in a good spot to be used to boost up over the wall.
|
Video: Forest of Illusion 1 Normal Exit - No Cape, Get Yoshi, (Bad Luck) Source: SilverStar6609 |
Wings
Normal Wings
These wings are harder and save less time than their cape counterpart.
|
Video: Forest of Illusion 1 Normal Exit - No Cape, Yoshi (Wings) Source: SilverStar6609 |
You can get a quick dismount/spit off yoshi and get ready to do the dupe.
|
Video: Forest of Illusion 1 Normal Exit - No Cape, Yoshi (Wings, Faster Setup) Source: Schwartz_RTA |
Key Wings
|
Video: Forest of Illusion 1 Normal Exit - No Cape, Yoshi (Z-Wings) Source: Schwartz_RTA |
All Castles, No Cape
If you don't have blue yoshi for this level, see strategies in No Cape, No Starworld section.
If you already have two flowers, you can just eat the red koopa at the midway and fly to the end of the level.
|
Video: Forest of Illusion 1 Normal Exit - No Cape, Blue Yoshi (Flower Grab) Source: Schwartz_RTA |
Small Only
|
Video: Forest of Illusion 1 Normal Exit - Small Only Source: rezephos |
Secret Exit
96 Exit
The dismount jump at the end saves about a quarter second of lag over a normal jump.
|
Video: Forest of Illusion 1 Secret Exit - Cape, Get Yoshi Source: SilverStar6609 |
95 Exit, No Cape
|
Video: Forest of Illusion 1 Secret Exit - No Cape, Get Yoshi Source: Sten |
Small Only
|
Video: Forest of Illusion 1 - Small Only Source: rezephos |