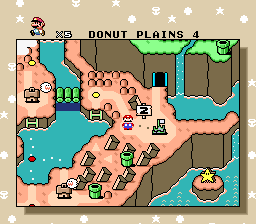
ドーナツへいや コース4
| ドーナツへいや コース4 | ||||||||||||||||

| ||||||||||||||||
| ← ドーナツへいや コース3 ~ ドーナツへいや みどりスイッチ → | ||||||||||||||||
| Powerups | ||||||||||||||||
| Lunar Dragon | ||||||||||||||||
| Goal Times | ||||||||||||||||
| ||||||||||||||||
Contents
[hide]96 Exit & All Castles
Grab Yoshi here if you are attempting VD1 wings and/or VD2 clip, otherwise use the No Starworld strat below.
|
[Expand]
Video: Donut Plains 4 - Cape, Get Yoshi Source: Sten |
No Starworld
Flying lower brings more foreground objects into view and makes it easier to adjust flight speed to 51. Flying higher is recommended for beginners, especially considering the goomba rain spawns from the top of the screen.
|
[Expand]
Video: Donut Plains 4 - Cape Source: SilverStar6609 |
95 Exit, No Cape
In 95 exit, grab fire here in order to kill Morton quickly.
|
[Expand]
Video: Donut Plains 4 - No Cape, Get Fire, Yoshi Source: Sten |
No Cape, No Starworld
Star Strat
If entering the stage as fire mario, grab the star from the roulette block to clear the end of the stage easily.
|
[Expand]
Video: Donut Plains 4, No Cape, Fire, Get Yoshi Source: MinionX |
Fire Flower Grab
If entering the stage as small mario, grab fire from the roulette block in order to kill Morton, Ludwig and Roy quickly.
|
[Expand]
Video: Donut Plains 4, No Cape, Get Fire, Get Yoshi Source: MaestroBrau |
Alternatively doing it scrolless is slightly less optimal but seems a little bit easier. This also shows the small mario yoshi grab, also slightly slower but useful to be familiar with rather than turn back for the midway if you go too far which is easily done.
|
[Expand]
Video: Donut Plains 4, No Cape, Get Fire, Get Yoshi, Scrolless Source: Fitz1889 |
Blue Shell Strat
This is an advanced strat, as the blue shell throw can be pretty tricky. The yellow shell bounce at the start only saves about 0.3 seconds and can be omitted.
|
[Expand]
Video: Donut Plains 4, No Cape, Fire Get Yoshi (Blue Shell) Source: Lui |
|
[Expand]
Video: Donut Plains 4, No Cape, Fire Get Yoshi (Blue Shell Early P) Source: Schwartz_RTA |
Fastest Strat
The fastest way to clear the level. The fire grab doesn't lose time, however the jump at the end is finicky and is required in order to be faster than the blue shell route.
|
[Expand]
Video: Donut Plains 4, No Cape, Fire Get Yoshi (Fastest) Source: LostC0re |
Small Only
Shell Strat
|
[Expand]
Video: Donut Plains 4 - Small Only (Shell) Source: Rezephos |
Under Bro Strat
The jump under the hammer bro after the roulette block has a fairly small window.
|
[Expand]
Video: Donut Plains 4 - Small Only (Under Bro) Source: Rezephos |
Lunar Dragon
Normal
|
[Expand]
Video: Donut Plains 4 - Lunar Dragon Source: Umari0 |
Pipe Fly
Spam cape spins in the underground section to manipulate the camera and make the pipe fly setup consistent. A turnback might be needed on the way up to the 3-Up Moon.
|
[Expand]
Video: Donut Plains 4 - Lunar Dragon (Pipefly) Source: Lui |
メインページへ