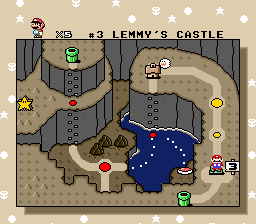
Difference between revisions of "バニラドームのしろ"
Yuniruyuni (talk | contribs) (Created page with "{{LevelStats |title=バニラドームのしろ |image=File:LemmysCastle.png |96exit=305 |95exit=297 |allcastles=305 |lunardragon=305 |powerups=File:mushroom.png ...") |
Yuniruyuni (talk | contribs) |
||
| Line 28: | Line 28: | ||
{{Levels/ja}} | {{Levels/ja}} | ||
| + | [[Category:Japanese translation]] | ||
[[Category:バニラドーム]] | [[Category:バニラドーム]] | ||
[[Category:コース]] | [[Category:コース]] | ||
Latest revision as of 13:02, 8 September 2024
| バニラドームのしろ | ||||||||||

| ||||||||||
| ← バニラだいちのとりで ~ バターブリッジ コース1 → | ||||||||||
| Powerups | ||||||||||
| Lunar Dragon | — | |||||||||
| Goal Times | ||||||||||
| ||||||||||
Cape Categories
Spinning the cape at the start causes magikoopa to spawn out of the way. Alternatively, duck-jump on magikoopa immediately when the level starts for safety.
Let go of the d-pad before hitting the p-switch, then neutral jump off the turn blocks in order to maintain full speed.
|
Video: Lemmy's Castle - Cape Source: Sten |
All Castles, No Cape
Room 1 lower route. Room 2 has a setup for easily getting the cycle and the end. Note keeping left until the platform reaches the top at 235 on the in game timer. Then running to the right and hold and keep help right,run and a jump button and you'll get to the end in time to jump up.
|
Video: Lemmy's Castle - No Cape dboost Source: Fitz1889 |
95 Exit, No Cape
Without a cape, manipulating Magikoopa to spawn on the bottom is different. Start holding left when entering the level, and switch to right as soon as Mario appears. Additionally, jumping up to the P-switch is more difficult with Magikoopa in the way. A safer strat is just to stomp Magikoopa at the start of the level.
|
Video: Lemmy's Castle - No Cape Source: Dotsarecool |